
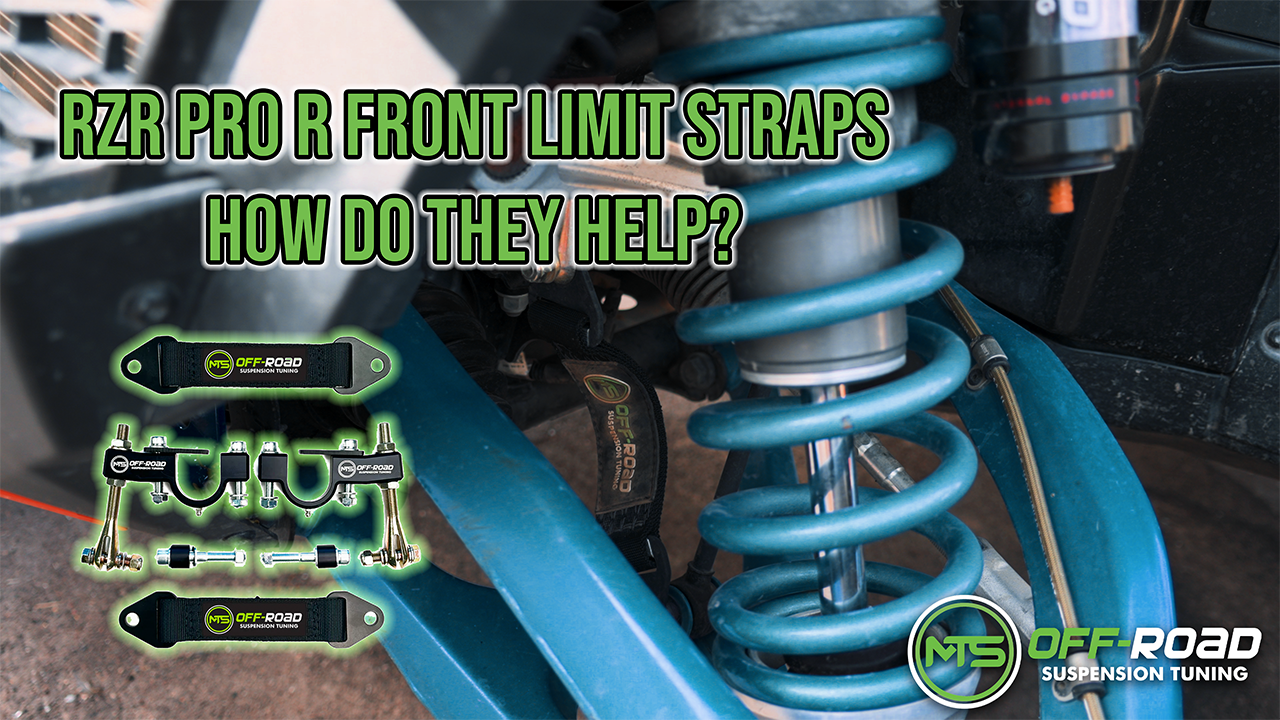
Today we’re walking you through the full installation of the MTS Front Limit Strap Kit for the Polaris Pro-R, Turbo-R, and Pro-S. Follow the steps below carefully—proper setup is critical to performance and chassis longevity.
Tools You’ll Need
Before starting, make sure you have:
-
Floor jack
-
15mm socket + extension
-
8mm Allen
-
10mm Allen
-
16mm socket
-
Two 18mm wrenches
-
Impact (optional but helpful)
Step 1: Jack Up the Vehicle
Start by safely lifting the car. Make sure it’s properly supported before beginning the install.
Step 2: Remove the Sway Bar Bracket
-
Use a 15mm socket with an extension to remove the sway bar bracket bolts.
-
The top of the bolt is square, so you only need to hold it from the bottom.
-
Once the bolts are removed, take off the sway bar bracket.
Step 3: Install the MTS Billet Bracket
-
Grab the MTS-supplied billet bracket.
-
Reinstall it with the long portion facing the rear of the vehicle.
-
Use the supplied 10mm bolts.
-
Install them with the bolt head facing up and the nut on the bottom.
Step 4: Install the Reinforcement Tabs (Very Important)
Your kit includes two metal reinforcement tabs. These are critical for strengthening the chassis.
-
Slide the tab onto the bolt.
-
Position it against the mount facing the rear of the vehicle.
-
Insert the bolt through the tab and bracket.
-
Repeat on the opposite side.
To tighten:
-
Use an 8mm Allen and a 16mm socket.
Do not skip or misinstall these tabs. They are essential for frame strength.
Step 5: Assemble the Limit Strap & Clevis
-
Unscrew the jam nuts.
-
Remove the washers and spring (the springs are not needed—discard them).
-
Remove the 5/8” bolt and nut.
-
Install the limit strap into the clevis.
-
Reinstall the bolt and secure it.
Step 6: Set the Jam Nut (Most Important Step)
Proper adjustment here is critical.
-
You want 2 inches of thread showing above the lower jam nut.
-
Too tight = excessive tension on the frame.
-
Too loose = straps won’t function properly.
Do not thread the clevis too far in. Over-adjustment can cause issues.
Once properly adjusted, you’re ready to install the lower bolts on the sway bar end link.
Step 7: Remove Lower Sway Bar End Link Bolts
Pro tip: Lowering the vehicle makes removal easier.
-
Lower the car for better axle clearance.
-
If applicable, switch to comfort mode and turn the wheel to allow the suspension to settle fully.
To remove:
-
Use two 18mm wrenches to break the bolts loose.
-
These can be very tight—use extra leverage if needed.
-
Once loose, remove with an impact if available.
Step 8: Install New Hardware & Spacers
Your kit includes spacers:
-
If NOT running front sway bars → install spacers to fill the gap in the arm.
-
If running front sway bars → use only the stepped spacers included.
The stepped portion fits inside the mounting tab.
Installation order (rear to front):
-
Insert bolt from back to front.
-
Add spacer.
-
Install limit strap onto bolt.
-
Add washer and nut.
Tighten using:
-
10mm Allen
-
18mm wrench
Make sure these bolts are fully tightened. If they loosen during riding, the strap can detach.
Step 9: Final Upper Mount Install
For the final step:
-
Install one jam nut washer.
-
Slide the clevis down into the bracket.
-
Install the second washer on top.
-
Thread on the nut and tighten securely.
Final Adjustment & Troubleshooting
If you hear a clunking sound after installation:
-
You can slightly tighten (shorten) the limit strap.
-
Do not over-tighten beyond recommended settings.
Once your clevis jam nuts are tightened and everything is secure, your install is complete.
You’re Ready to Ride
With your MTS Front Limit Strap Kit properly installed and adjusted, you’re ready to enjoy improved durability and suspension control.
If you have any questions during installation, don’t hesitate to reach out—we’re always happy to help.
Leave a comment
This site is protected by hCaptcha and the hCaptcha Privacy Policy and Terms of Service apply.